Creating a template for the CSV file
The CSV file, imported using the Easy Asset Integrator, does not need to be created as an empty file and filled manually. The system offers several options for templates that can be easily generated. The lines imported using a template can then be adjusted as needed in the dialog itself or in the file.
If no file has yet been imported using the Easy Asset Integrator , a template can be created using octoplant's sample data. There is also the option to create a template using all or only selected components in the system's current project tree. The three options are available via the Create template with example data button or the corresponding arrow in the menu bar.
Creating a template using octoplant example data
A template with octoplant's example data can always be created, regardless of whether the server system was installed with or without example data.
-
Click on the Create template with example data button.
-
A directory dialog opens where you can select a name as well as the location for the newly created CSV file.
-
Click on Save.
-
A CSV file with octoplant's sample data has now been created.
Creating a template using all components from the current project tree
 This can take a long time if you have a large server archive. If you have more than a thousand components, we recommend that you create a template with only selected components.
-
Click on the arrow next to the Create template with example data option and then select Create template with all components from the dropdown menu.
-
A directory dialog opens where you can select a name as well as the location for the newly created CSV file.
-
Click on Save.
-
A CSV file with all components of the current Project tree will now be created.
Creating a template with selected components from the current project tree
-
Click on the arrow next to the Create template with example data option and select Create template with selected components from the dropdown menu.
-
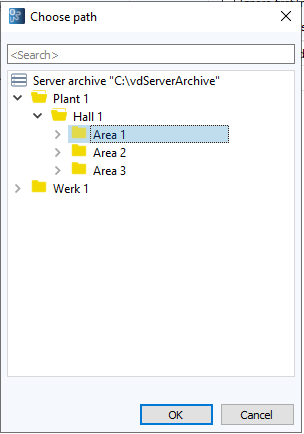
The Choose path dialog will now open.
Here, you will see the directory structure of your Project treewith the components that are present on the server.
-
Select a component or directory from which you want to create the template for import.
-
Click on OK.
-
A directory dialog opens where you can select a name as well as the location for the newly created CSV file.
-
Click on Save.
-
A CSV file with the selected components will now be created.
If you have already imported a manually created file or a template and corrected the values in the Easy Asset Integrator dialog or in the file itself, you can save it using the Save or Save as button and use it as a template for the next, perhaps similar, import.