Checking in components
During Check-In, changes that you have saved as a new version are copied to the server.
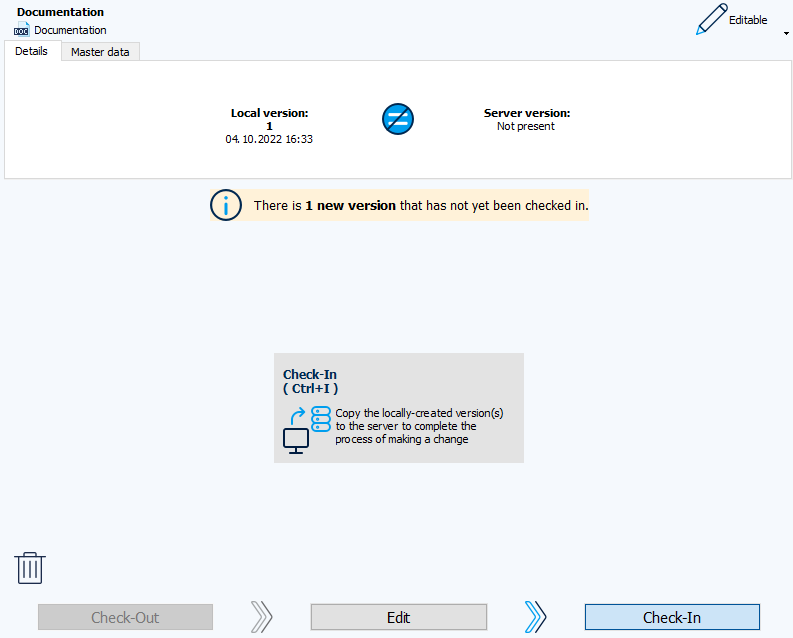
The Check-In step in the navigation bar of the Working area is automatically selected if you have created a new version of the currently selected component and it has not yet been checked in. This is indicated in the Details section by the ![]() symbol.
symbol.
Prior to the Check-In, the system checks whether the working directory is identical to the last version.
 You cannot check-in if the version on the server is newer than your local version.
-
Select the desired component in the Project tree.
A local version of the component must have been created that has not yet been checked in. -
In the Check-In view, click on the Check-In button in the center or press the keyboard shortcut Ctrl+I.
-
The version is now stored on the server.
In the Client settings dialog, Check-In/Check-Out tab, you can specify that the component and the working directory are automatically deleted locally after successful check-in. By default, the component is not deleted locally when checking in.