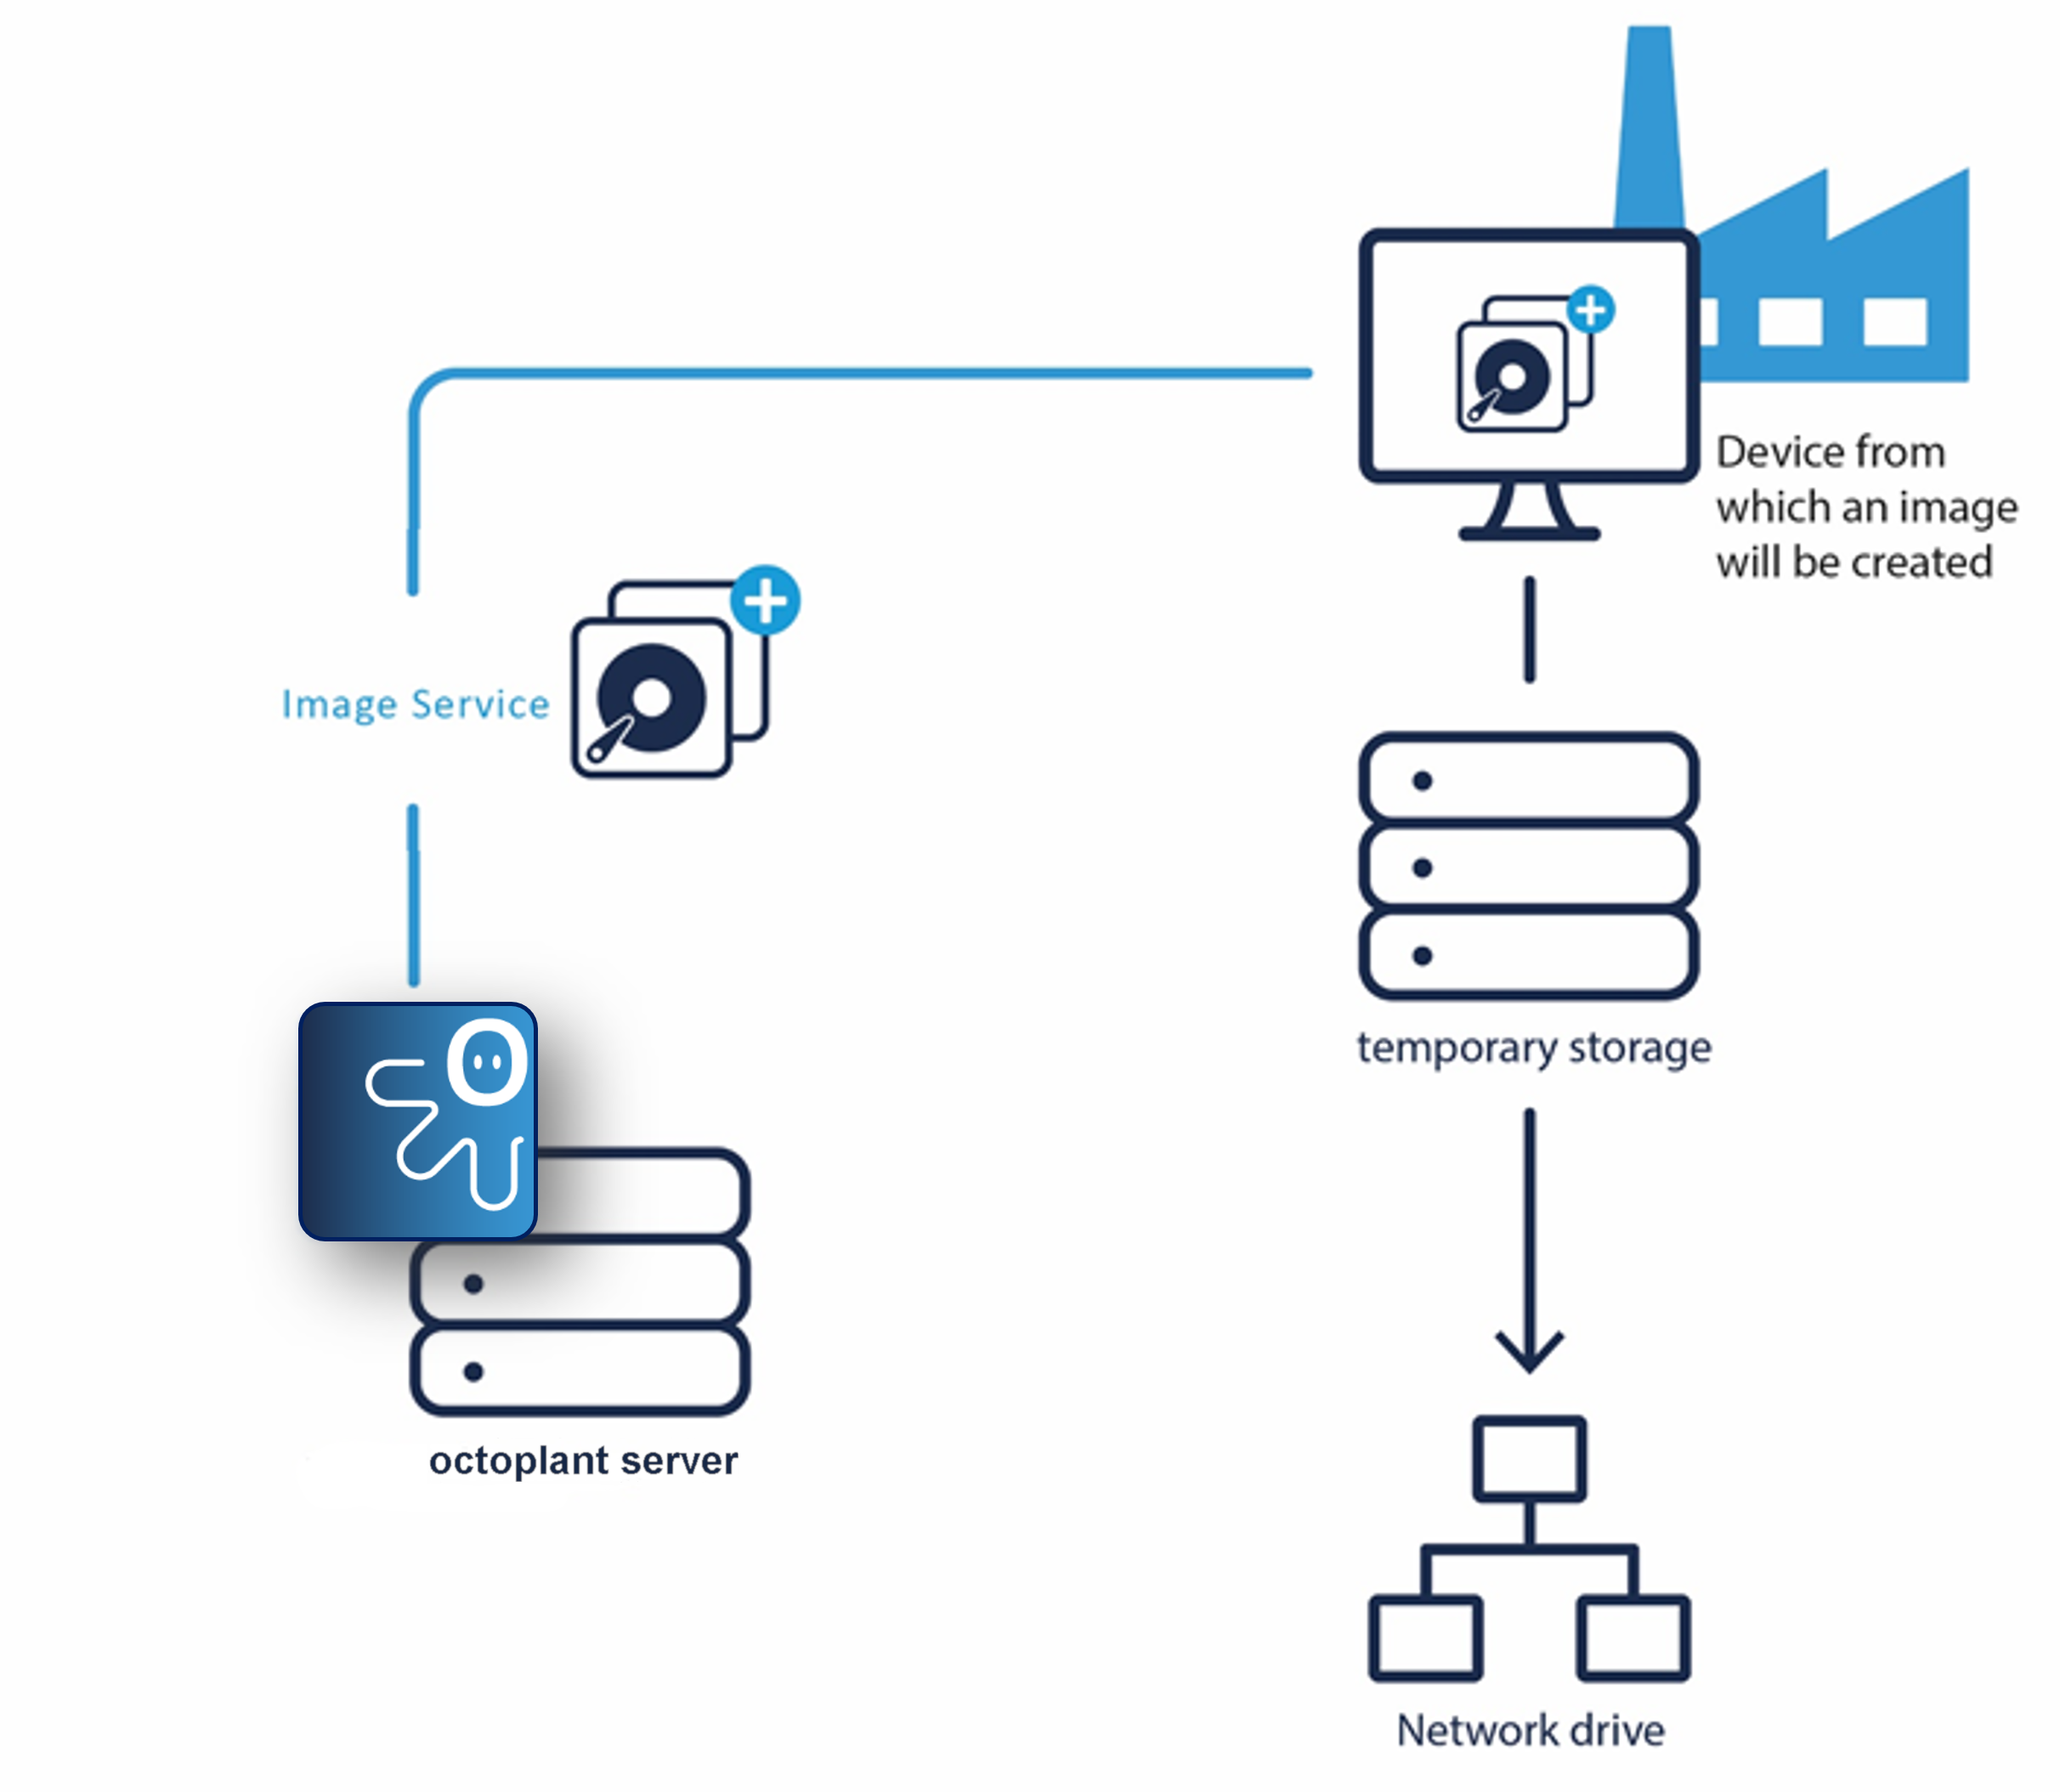
Saving images using a temporary directory on the network
Using this transfer method, the image of a device is created on a (network) drive in the network and temporarily stored there. From this (network) drive, it will then be moved to the target drive.
Uses for this transfer way:
- Network transfers
- Authorization required for transfers
This is often appropriate, when the target drive that you want to save the image on, is located on another network than the PC that was used to create the image.
In this case, the target drive may only be reachable only by the server or by a agent. This moves the image onto the target drive. As it is possible to specify a separate temporary directory for each job, several network transitions can be performed.
It is still possible to create a Image Service job using an agent.
The device from which the image is created does not have the necessary rights to save the image on the target drive.
In this case, it is sufficient if the server or a agent has the necessary write access to the target drive in order to move the image from the temporary (network) drive to the target drive.
This means that it is not necessary to give each client permission for the central storage location. The access data for the server to this storage location can be stored in the Global settings module and do not have to be made known to each job.
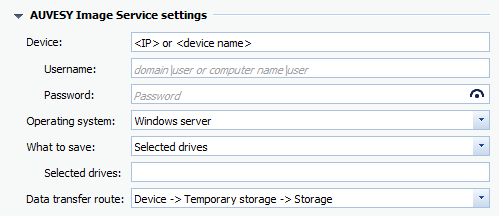
Configure Job configuration:
- Go to Job configuration and in the Image Service settings section, select the data transfer route Device -> Temporary data storage -> storage.
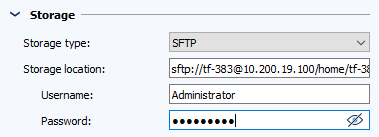
- In the Storage section, enter the path and the necessary login information required for the directory in which the created image is to be stored.
-
In the Storage type dropdown menu, select whether it is a directory on the network to which you specify the UNC path, or whether the image is to be placed on an SFTP server.
-
Specify the Storage location according to the selected storage type.
-
If you selected UNC, specify the UNC path to the directory.
Format: \\server_name\share_name\path.
-
If you selected SFTP, specify the IP address of the SFTP server and the corresponding directory on the SFTP server.
Format: sftp://Server:Port/Path/...
-
-
Specify the Username and Password for the selected location.
The specified user must have read and write permissions to the directory.
You can specify the user name as follows:
<domain>\<user_name> or <computer name>\<user_name>.
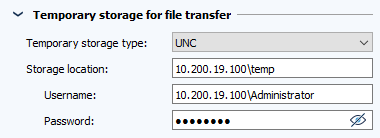
- In the Temporary storage for file transfer section, specify the storage type, location, and required credentials for the directory in which the created image is to be temporarily stored.
-
In the Storage type dropdown menu, select whether it is a directory on the network to which you specify the UNC path, or whether the image is to be placed on an SFTP server.
-
Specify the Storage location according to the selected storage type.
-
If you selected UNC, specify the UNC path to the directory.
Format: \\server_name\share_name\path.
-
If you selected SFTP, specify the IP address of the SFTP server and the corresponding directory on the SFTP server.
Format: sftp://Server:Port/Path/...
-
-
Specify the Username and Password for the selected location.
The specified user must have read and write permissions to the directory.
You can specify the user name as follows:
<domain>\<user_name> or <computer name>\<user_name>.
- Confirm by clicking on OK.
 You can specify the login information as follows:
<Domain>\<Username> or <Computername>\<Username>
| Related topics |
|---|
| Creating images in 4 steps |
| Configure standard settings |