Assigning standard libraries to projects
To display matches and differences between blocks installed in the project and their standard libraries in LibraryManagement, a standard library must always be assigned to the project. This step is also done in the UserClient.
Procedure
- In UserClient, select the component containing the project to which you want to assign a standard library.
- Right-click on the selected component and then select in the context menu the entry Edit component configuration.
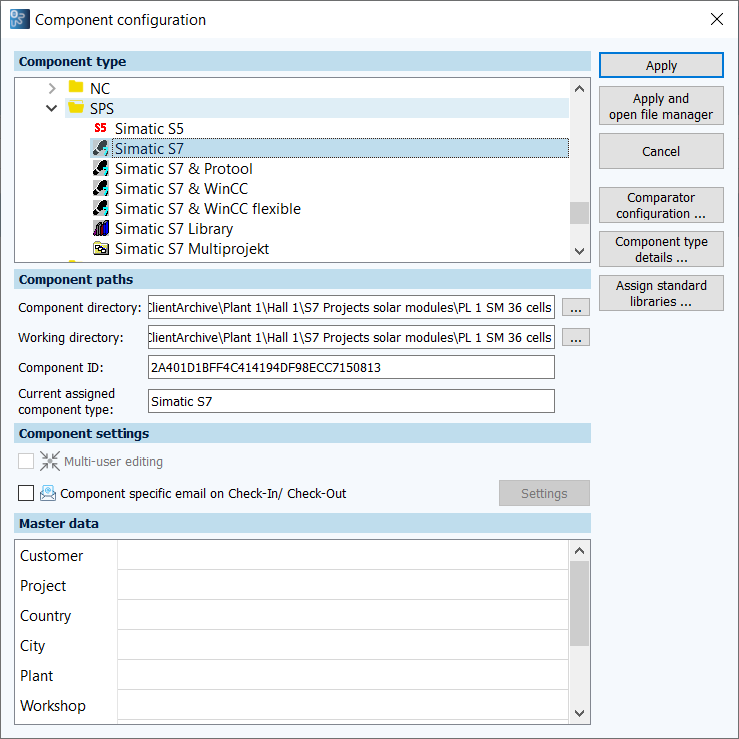
- The dialog Component configuration will open.
- Click on Assign standard libraries.
- The dialog Assign standard libraries will appear.
- In Locally available standard libraries, select the standard library that you want to assign.
- Use the button
 to transfer the selected standard library to the section Standard libraries assigned to component.
 - Confirm by clicking on OK.
- In the Component configuration dialog, click on the button Apply.
- Create a new version and check it in.
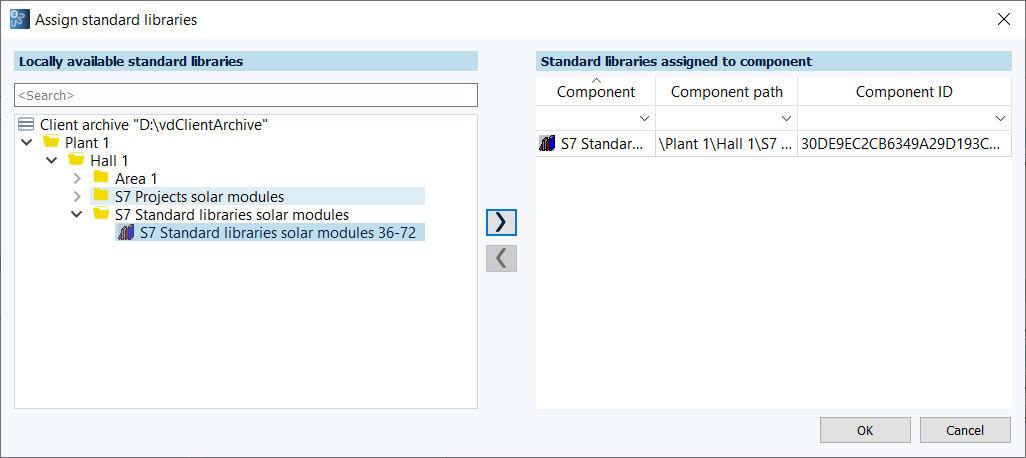
 In this dialog, only the libraries that are locally available will be shown. Make sure to first check out the libraries that you want to assign.
It is also possible to assign multiple standard libraries to a component.
If you are managing multiple projects in a single component and assign a standard library to this component, this standard library will also then be assigned to all projects in the component.
| Related topics |
|---|
| UserClient |