Create a synchronization job
This topic describes how to create a synchronization job.
- Start the AdminClient and open the Server synchronization module.
- Select Create in the menu bar on the Configure tab.
-
The Create job wizard starts.

-
Select Next.
-
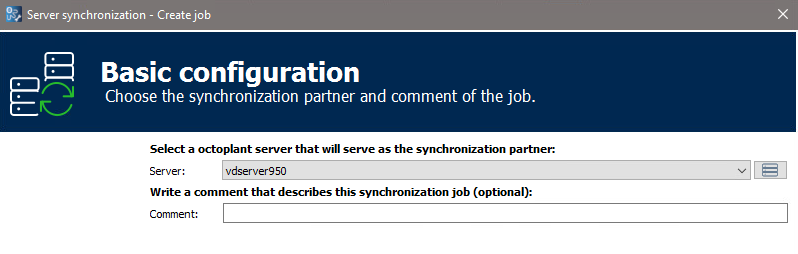
The Basic configuration page opens. Here you specify the synchronization partner and can enter a comment that describes the synchronization job. The synchronization direction is not yet defined.
-
Select Next.
-
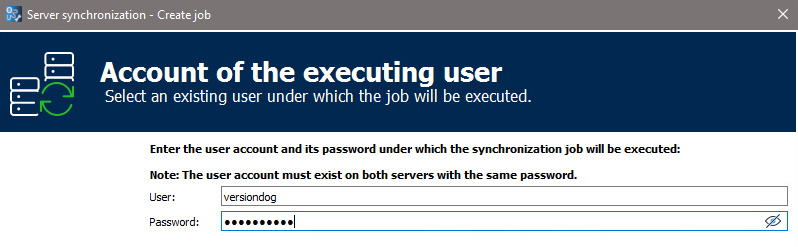
On the Account of the executing user page, enter the login information for the user under which the synchronization is to be carried out. The user must have administrative rights for both servers. The user's name and password must be the same on both servers.
-
Select Next.
-
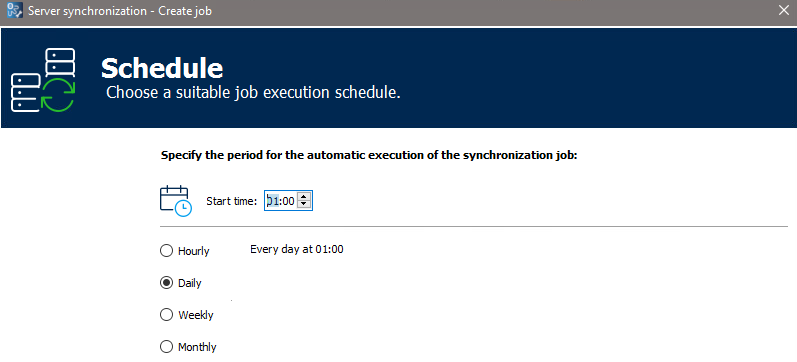
On the Schedule page, define a schedule for the automatic execution of the synchronization job.
-
Select Next.
-
On the On error page, specify whether and how often the system should try to run a failed synchronization job again if an error occurs.

-
Select Next.
-
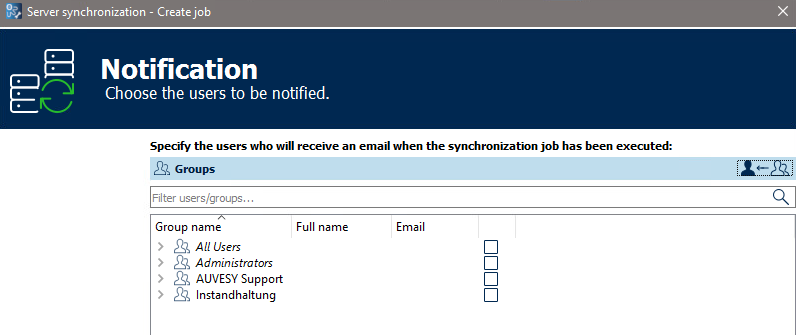
On the Notification page, specify who should receive an email when the synchronization job has been executed.
-
Select Next.
-
In the Configuration selection dialog, specify how you want to select elements. The Express and User-defined options are available.
-
Express
In the first step, you can specify which elements are to be synchronized. Then you can specify the synchronization settings for all selected elements in a separate dialog.
-
User-defined
With the user-defined configuration, the selection of elements and the synchronization settings are displayed in a dialog. You can define the synchronization settings for each element separately. This can lead to circular connections, especially if the synchronization job is executed several times in succession.
The selection of the elements and the synchronization settings are described on the following pages.
-
-
When you have made all the settings, select Finish.
-
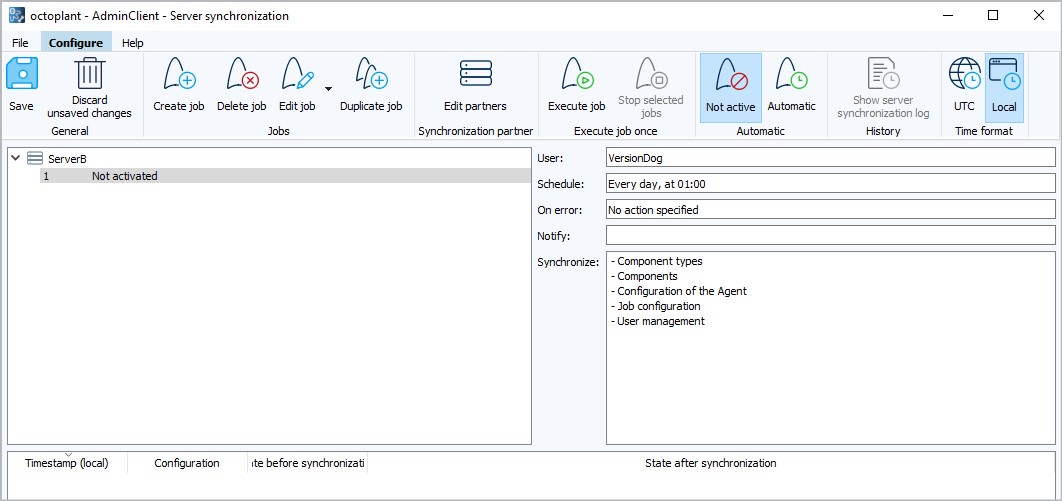
The job is created. The job details are displayed in the Server synchronization module.
You have the following options to change the job settings:
- If you select Edit job in the menu bar, the complete Create job wizard runs again.
- If you select one of the fields with the job details, only the dialog in which you can edit the corresponding detail opens.
To copy the job, select Duplicate job and edit the duplicate as needed.
Related topics