Use Your Own Security Certificate
This procedure, combined with proper Certificate Authority (internal or external) will fix NET::ERR_CERT_AUTHORITY_INVALID errors.
 This procedure is most useful for the IT department or domain manager.
This is an optional procedure you can perform if you wish to use your own certificate for OIDC instead of the one created by octoplant.
octoplant will create a self-certificate and private key automatically at run time.
To use your own certificate, create a 41388 entry in the server.ini file under the section Common as shown below:
[Common]
41388=https://<insert_server_name>
Use the name of your server in place of <insert_server_name> here and in the instructions below.
Other valid base URIs for the entry 41388=https://<insert_server_name> could be similar to one of the following:
-
https://localhost:64021/octoplant/
-
https://octo.plant.localhost:123
-
https://octoplant.landau.auvesy-mdt.com:64023
-
https://192.168.178.12:5555
-
https://[\:\:abcd\:1234\:dcba]\:9999
-
http://octo.ld.auvesy.de
 The host or domain name must contain ASCII characters only. If you have unicode characters you must replace them with their punycode representation.
Create the SSL certificate
-
Install OpenSSL.
-
Create an empty text file named sssan.conf in the OpenSSL executable folder.
The executable folder may vary depending on the OpenSSL distribution.
The executable folder will be the one with openssl.exe in it. -
Edit the new file with Notepad or similar plain text editor.
-
Enter the following text into that file:
Copy[req]
default_bits = 4096
prompt = no
default_md = sha256
x509_extensions = v3_req
distinguished_name = dn
[dn]
C = <insert country code>
O = <insert company name>
CN = <insert_server_name>
[v3_req]
subjectAltName = @alt_names
[alt_names]
DNS.1 = <insert_server_name>
-
Save
sssan.conf.
-
-
Open a CMD shell with Administrator rights.
Make sure you use Administrator rights for the shell. -
Change the shell to the OpenSSL executable folder.
-
Set the environment property OPENSSL_CONF. Enter the following in the shell:
CopySET OPENSSL_CONF=<full path to the OpenSSL executable folder>\openssl.cfg -
To generate an SSL certificate with SAN, enter the following in the shell:
Copyopenssl.exe req -new -x509 -newkey rsa:4096 -sha256 -nodes -keyout "<insert cert location>\server.key" -days 3560 -out “<insert cert location>\cert.crt" -config "sssan.conf"This will create two files in the chosen certificate directory:
- server.key: A private key file
- cert.crt: The certificate
Leave the Administrator shell open if you will install the certificate on the server. -
Move to the configuration local directory
-
Rename:
- cert.crt to ApiCertificate (no extension)
- server.key to ApiPrivateKey (no extension)
Certificate creation process complete"
The certificate creation process is complete. Now you can:-
Distribute Certificates to Client Computers by Using Group Policy
-
or sign the certificate with your in-house Certificate Authority
Install the certificate on the server
-
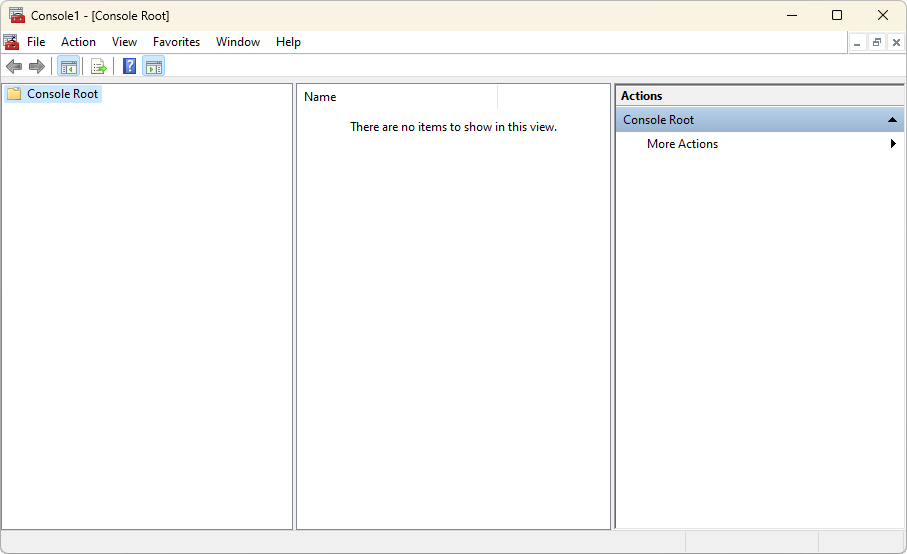
Open Microsoft Management Console by typing
mmc<Enter>at the shell command line. Make sure you start the Microsoft Management Console with administrator rights.The Microsoft Management Console appears:
-
Create a new console snap-in:
-
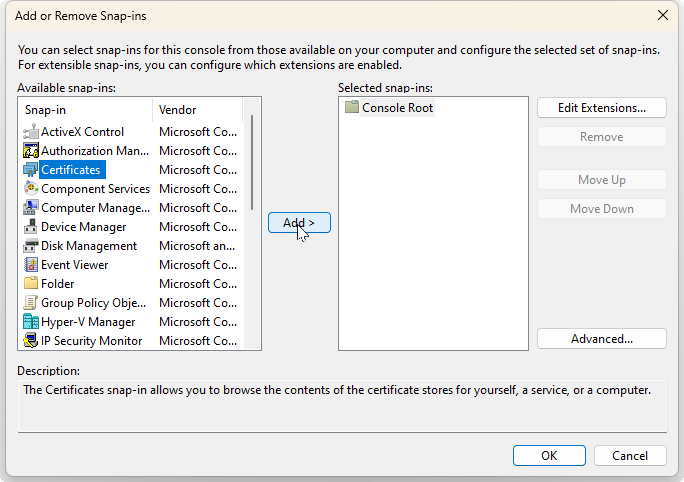
Select File -> Add/Remove Snap-in….
The Add or Remove Snap-ins dialog appears:
-
Select Certificates, and then the Add button.
The Certificates snap-in wizard will appear:
-
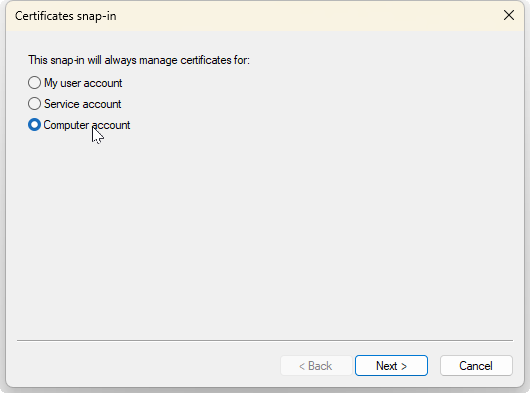
Select the Computer account radio button then the Next> button.
The Select Computer dialog will appear:

-
Select the Local computer radio button then the Finish button.
-
Select the OK button on the Add or Remove Snap-ins dialog.
-
-
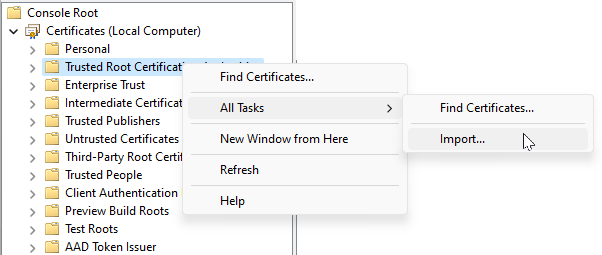
Expand Certificates under the Console Root.
-
Right-click on Trusted Root Certification Authorities.
-
Select All Tasks.
-
Then select Import, as in the following illustration:
The Certificate Import Wizard will appear:
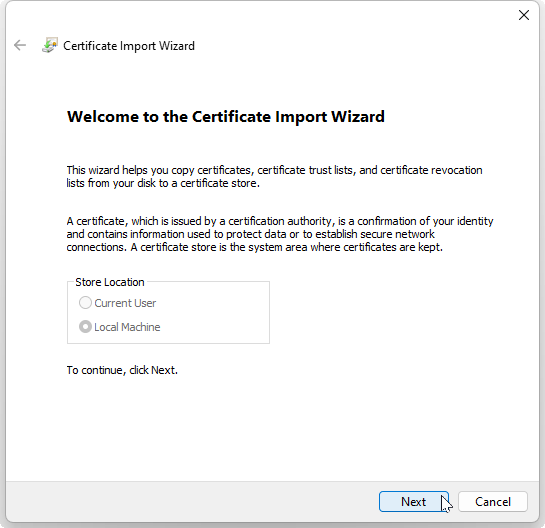
-
-
Select the Next button.
-
Select the Browse button.
A Windows Explorer dialog will open:
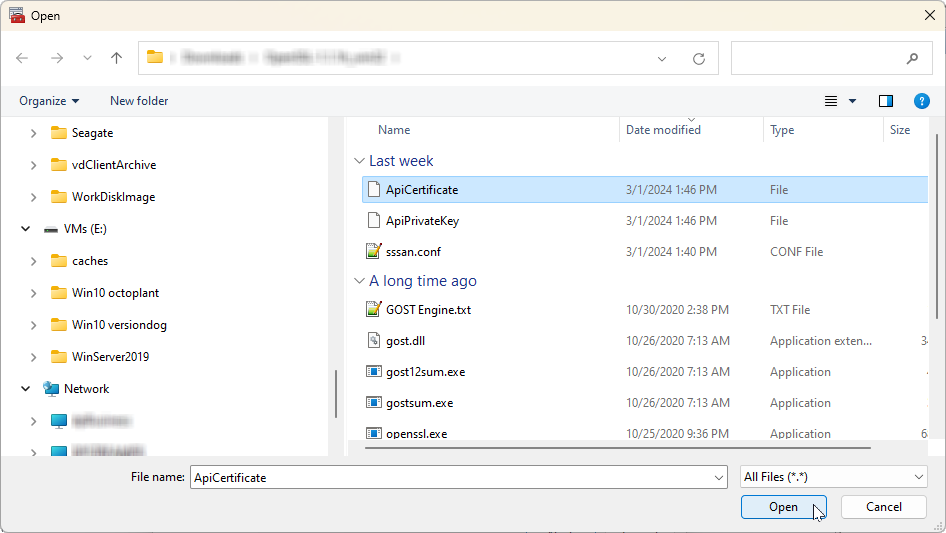
-
Browse to the location where you saved the ApiCertificate above, then select it.
Change the file type in the Explorer window to All files (*.*). -
Select the Open button.
The Certificate Import Wizard will display the file:
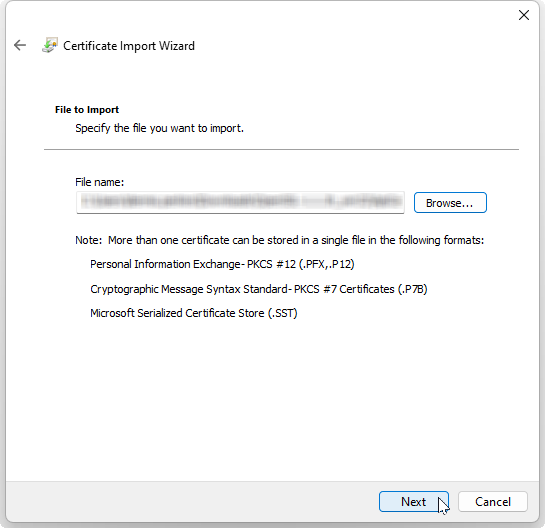
-
-
Select the Next button.
The next step is to verify the Certificate Store location:
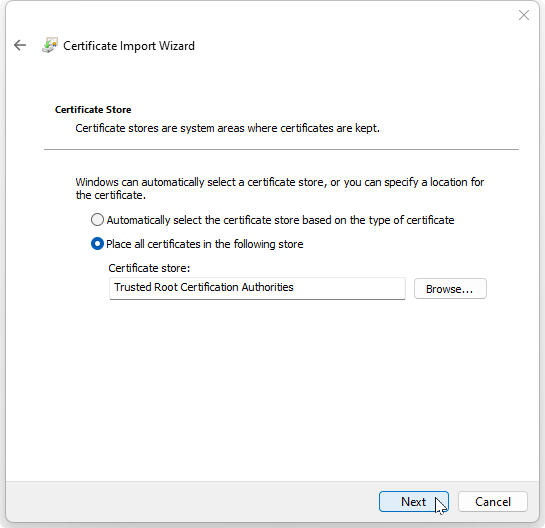
Verify the certificate store is the Trusted Root Certification Authorities.
-
Select the Next button.
The wizard will display the results:
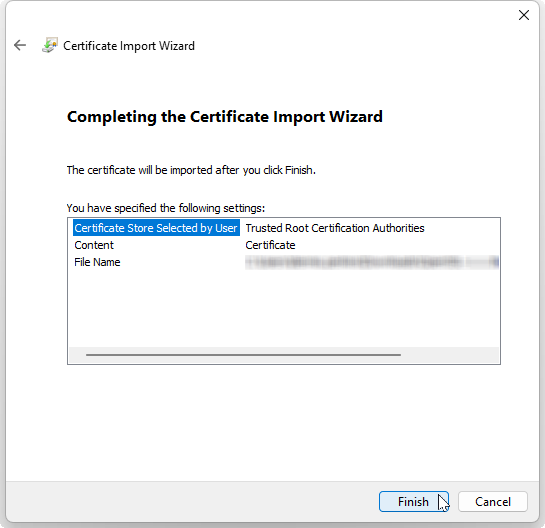
-
Verify the settings for this certificate.
-
Select the Finish button to complete the wizard.
The wizard will complete the import and display a dialog:
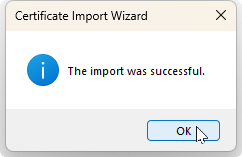
-
Select the OK button.
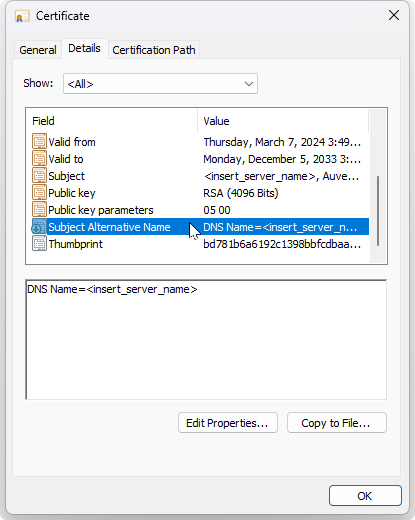
Verify the certificate
-
Under Certificates, find and right-click on <insert_server_name>:
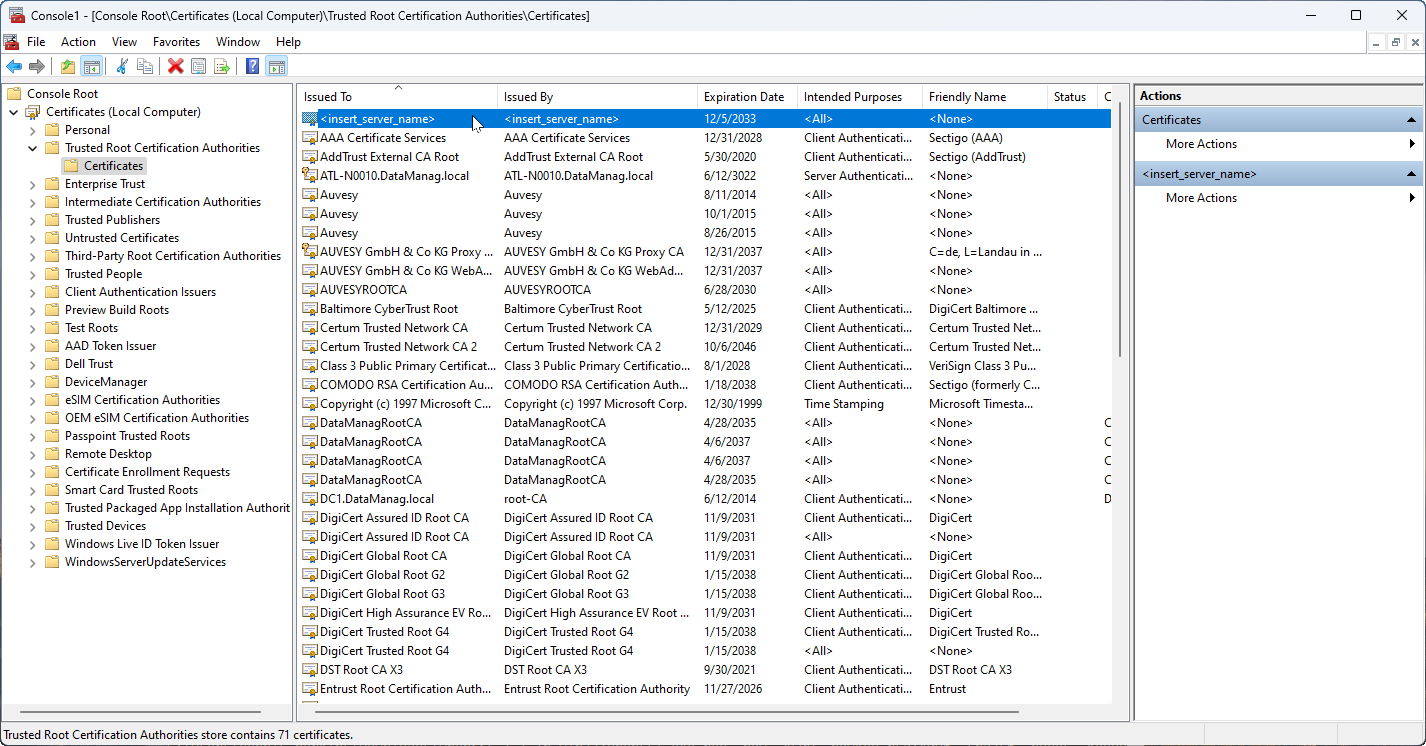
-
Select the Open menu item.
The certificate information will be displayed:
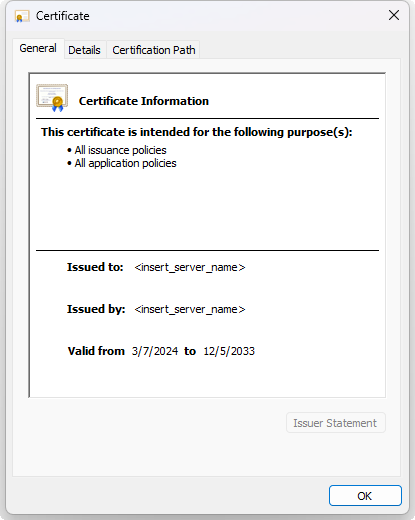
-
Select the Details tab, then the Subject Alternative Name to see the DNS and IP information you entered for this certificate:
-
Select the OK button, and exit the console.
Following the procedure described in this page, combined with proper Certificate Authority (internal or external)
will fix NET::ERR_CERT_AUTHORITY_INVALID errors.